


Table of contents
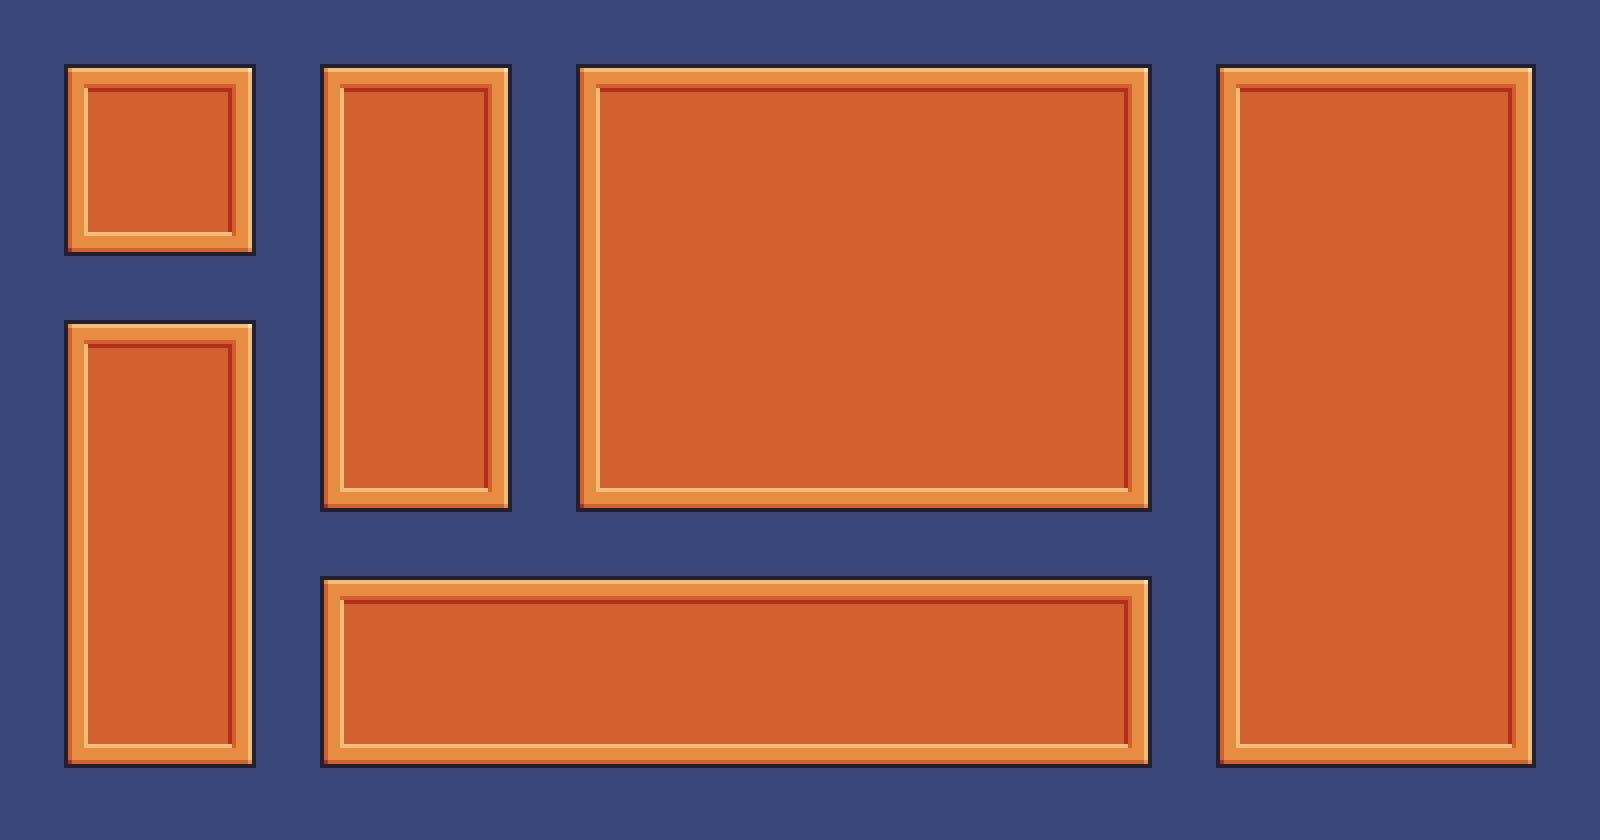
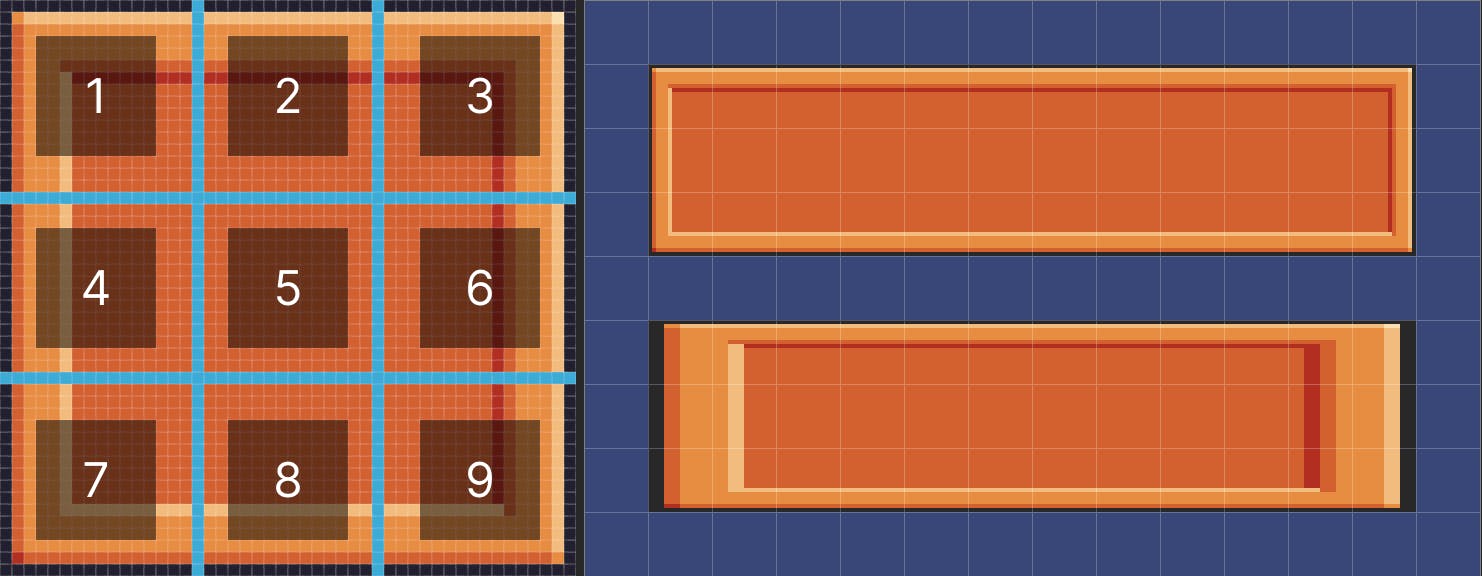
The 9-slice scaling technique allows resizing an image to a different aspect ratio without any ugly distortions. This is achieved by slicing the original image into 9 rectangular parts and using those to construct the final resized image. Take a look at the following example. In the top right, you can see the result of 9-slice scaling, while the bottom right shows the distortion that would occur with normal scaling.
Theory
When constructing the resized image, this algorithm first positions the original corner parts (1, 3, 7, 9) in the corners of the resulting image without modifying them. Next, it positions the edge parts (2, 4, 6, 8) on the edges of the resulting image and stretches them horizontally (2, 8) and vertically (4, 6). The remaining hole in the center is filled by stretching part 5.
This scaling technique is useful for fancy buttons, windows and the like. By only stretching the middle parts, the corners remain as is and are safe from unintended distortions. Let's take a look at how to implement this algorithm with the HTML Canvas API and JavaScript.
Implementation
Start by setting everything up. We need a canvas element, a rendering context and an image.
const canvas = document.createElement("canvas")
canvas.width = 1000
canvas.height = 1000
const ctx = canvas.getContext("2d")
document.body.appendChild(canvas)
const img = new Image()
img.src = "/box.png"
img.onload = () => // render logic here
As soon as the image loads, we'll start rendering. Calculate the size of a slice by dividing the image width by 3. Define each part with a 4 number tuple. The numbers represent the position (x, y) and size (width, height) of the part in the original image.
// calculate the size of a slice
const s = img.width / 3

// define the 9 parts as [x, y, width, height]
const part1 = [0, 0, s, s]
const part2 = [s, 0, s, s]
const part3 = [s * 2, 0, s, s]
const part4 = [0, s, s, s]
const part5 = [s, s, s, s]
const part6 = [s * 2, s, s, s]
const part7 = [0, s * 2, s, s]
const part8 = [s, s * 2, s, s]
const part9 = [s * 2, s * 2, s, s]
To render the target image, perform a total of 9 drawImage() calls that implement the logic described in the beginning of this article. The parts can easily be passed to the function calls by using the spread operator.
  // target width/height (try different values!)
  const width = 16 * 8
  const height = 16 * 4

  // draw the corners
  ctx.drawImage(img, ...part1, 0, 0, s, s) // top left
  ctx.drawImage(img, ...part3, width - s, 0, s, s) // top right
  ctx.drawImage(img, ...part7, 0, height - s, s, s) // bottom left
  ctx.drawImage(img, ...part9, width - s, height - s, s, s) // bottom right

  // draw the edges
  ctx.drawImage(img, ...part2, s, 0, width - 2 * s, s) // top
  ctx.drawImage(img, ...part8, s, height - s, width - 2 * s, s) // bottom
  ctx.drawImage(img, ...part4, 0, s, s, height - 2 * s) // left
  ctx.drawImage(img, ...part6, width - s, s, s, height - 2 * s) // right

  // draw the center
  ctx.drawImage(img, ...part5, s, s, width - 2 * s, height - 2 * s)
Putting it all together, we arrive at the following solution. Try changing the target width and height to make sure it works as intended. If you want to go even further, try putting the 9-slice algorithm into a reusable function.
Closing remarks
Even though the Canvas API lacks built-in support for 9-slice scaling, it's simple enough to implement it yourself. By using this technique, images become more flexible and can be resized freely without any distortions. Where have you seen or used 9-slice scaling in the web? Let me know in the comments.
References
- Box sprite by PixelFrog
- Unity manual: 9-slicing Sprites
- MDN: CanvasRenderingContext2D.drawImage()